
Fermentation is much more than just tossing ingredients into a jar and hoping things work out. Two simple tools—weights and airlocks—can smooth the way for successful ferments that taste great every time. I learned this firsthand after a fizzing jar of pickles turned my kitchen into a briny splash zone. After using these tools regularly, I noticed dramatic improvements: more crunch, brighter flavors, and fewer surprises with spoiled jars.

Why Weights and Airlocks Matter in Fermentation
Jumping into fermentation opens up a wide world of flavors and creative food saving. If you’re new to this adventure, knowing why people use fermentation weights and airlocks is crucial. It’s not just about fancy gadgets. Simple gear can help you avoid mold, funky flavors, and even the occasional messy overflow that happens when gas pressure builds up.
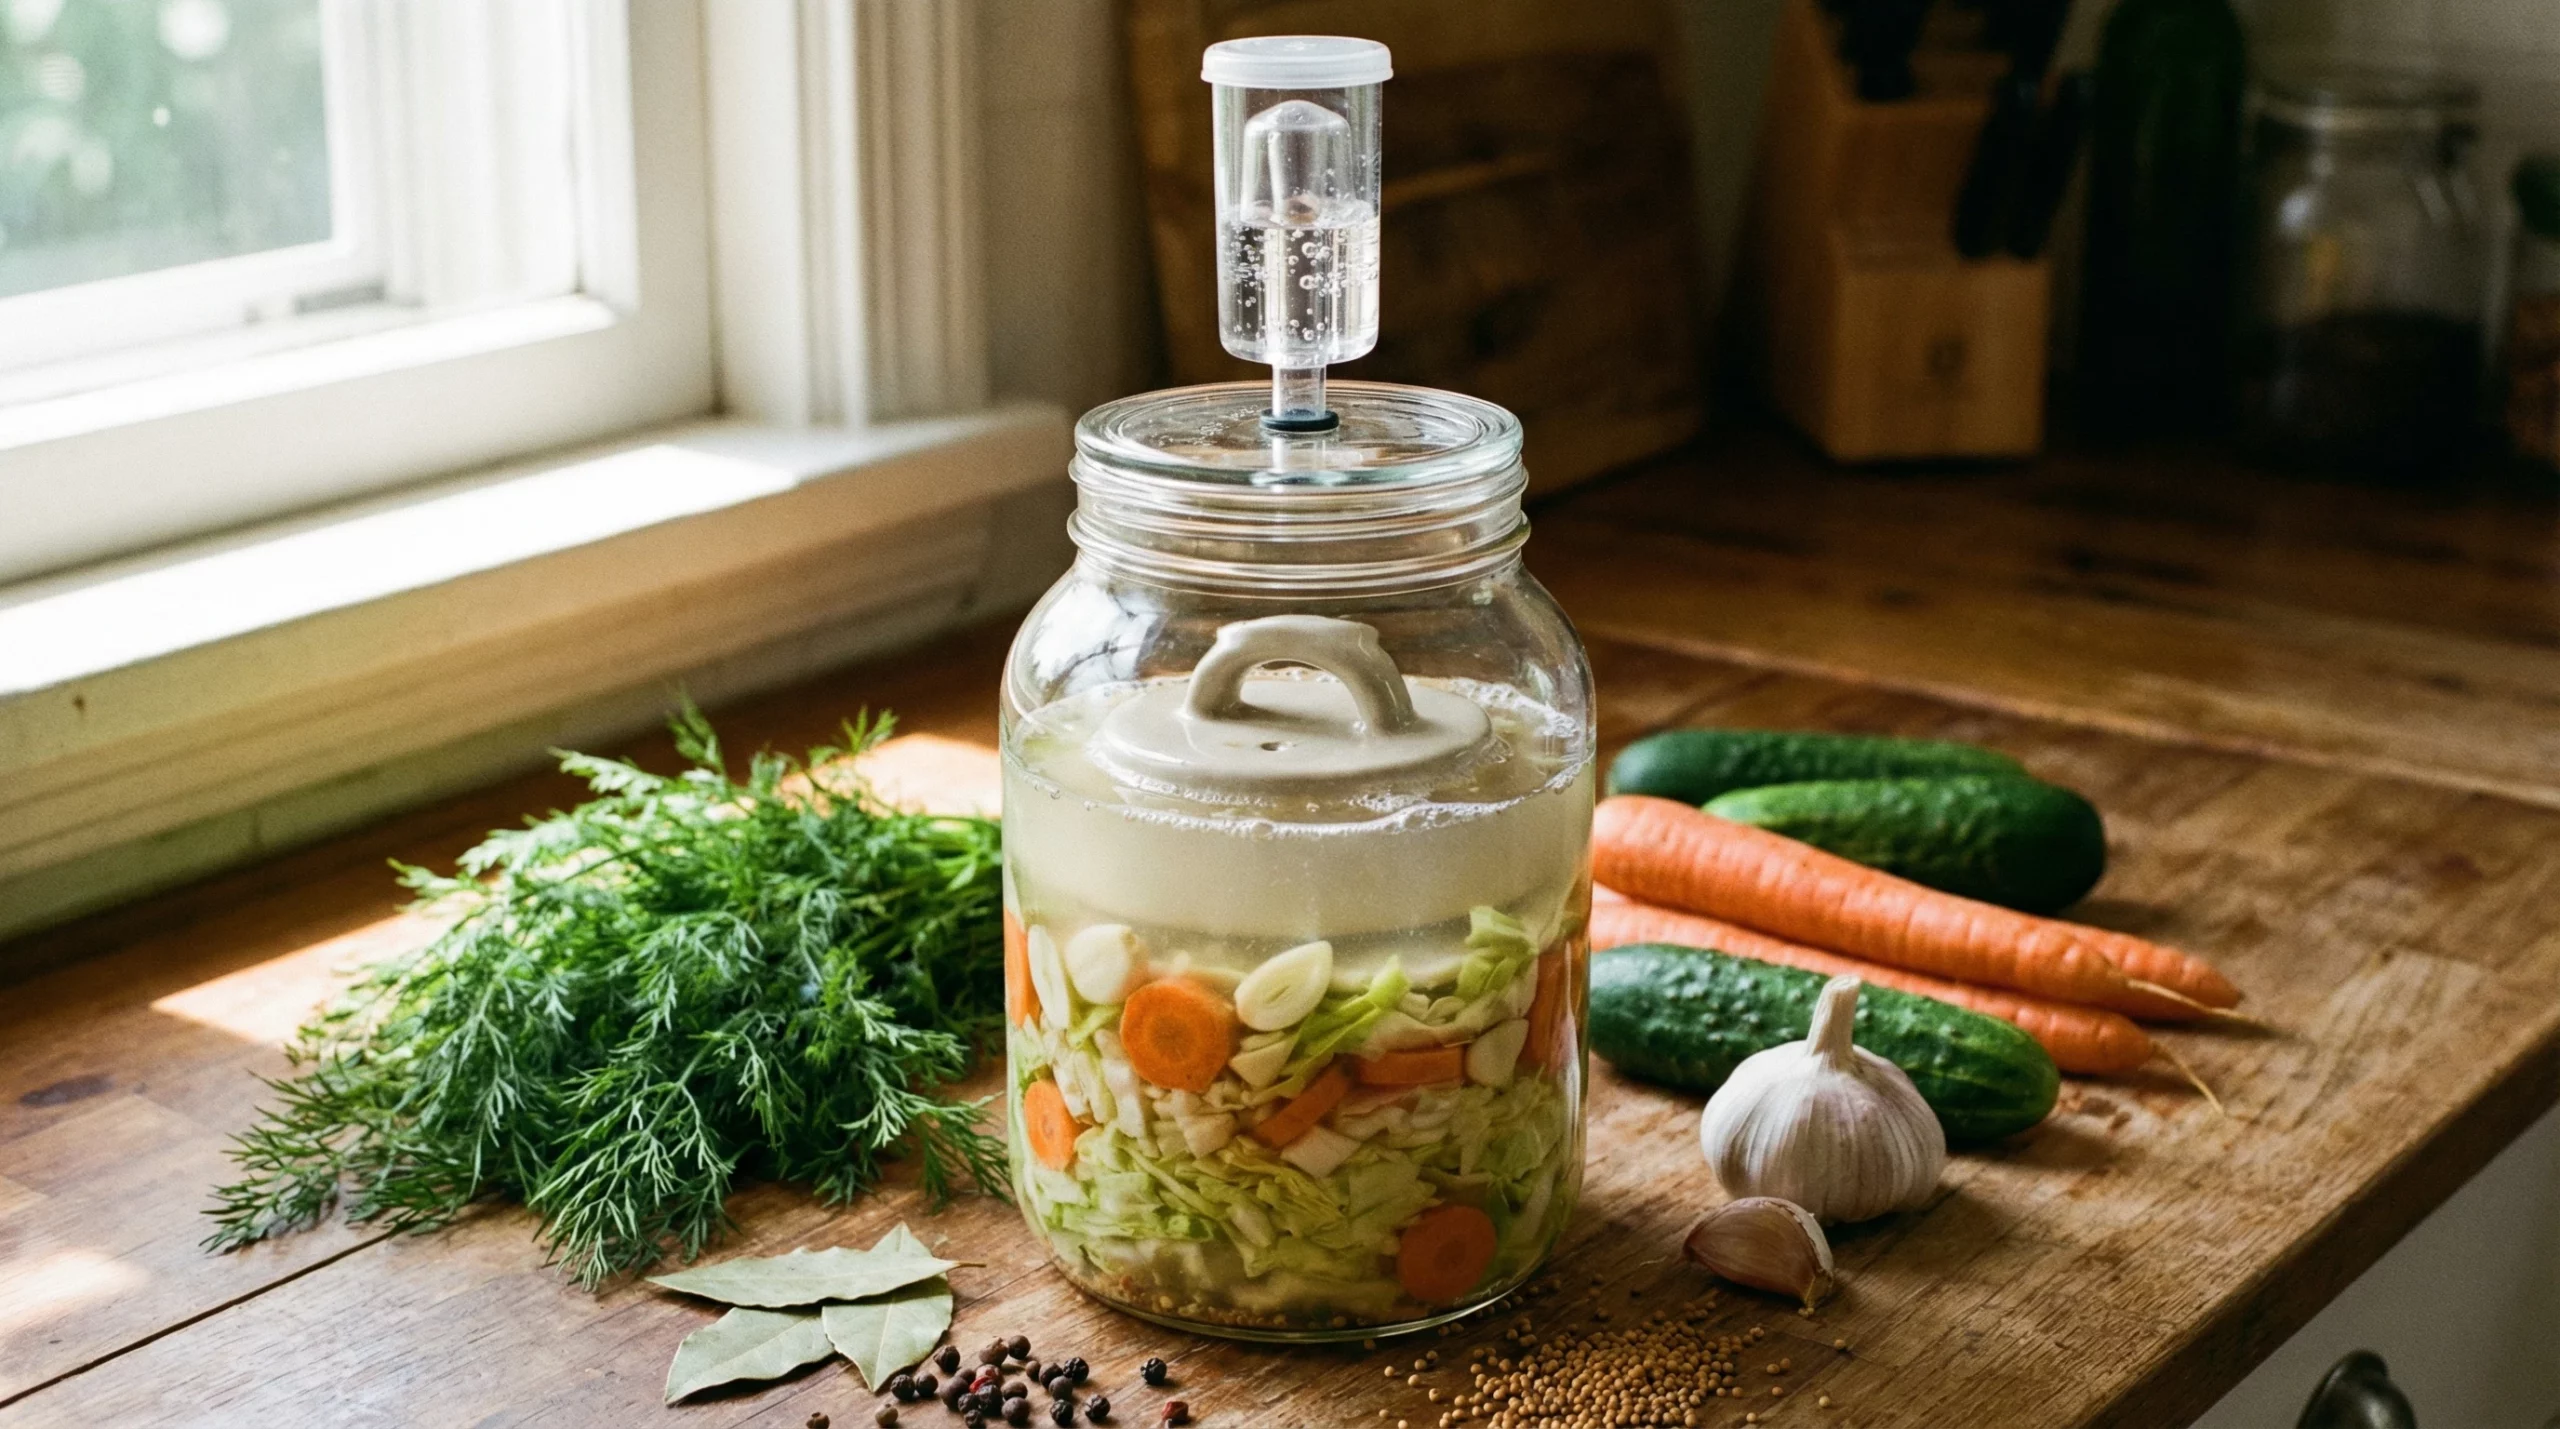
In traditional lactofermentation, keeping veggies submerged prevents spoilage from mold and surface yeasts. Weights press solids beneath the brine, removing air exposure. Airlocks allow bubbles of carbon dioxide to escape while stopping fruit flies and airborne yeast or mold from getting in. Some folks skip these extras, but without them, problems like fuzzy mold or fruit fly invasions happen more often. Trust me—losing a hard-earned batch is the last thing you want.
While fermentation practices go way back in history, adding these small tools today gives a real boost to your odds for delicious, consistent, and safe ferments. A little preparation now pays off in better results later.
How Fermentation Weights Work
Fermentation weights come in all sorts of materials: glass, ceramic, stainless steel, or even clean river stones if you’re improvising. Their main function is pressing food below the liquid’s surface. That’s key because beneficial bacteria thrive in oxygen-free, submerged environments, while spoilage microbes and molds love to hang out in contact with the air.
If you’ve seen fuzzy white layers on your sauerkraut, your weight probably wasn’t up to the task. I’ve set everything from a small nested jar to storebought tempered glass weights on top of my veggies, and dedicated weights really make the difference. They’re easy to sanitize, fit most jars smoothly, and save time.
- Glass Weights: Super easy to clean, don’t react to brine, and let you see your ferments at a glance.
- Ceramic Weights: Glazed, food-safe, and sturdy. Just double-check for chips or cracks before using.
- Improvised Weights: A brine-filled resealable bag or a clean stone can work, but results can be inconsistent compared to purpose-built options.
Whatever you use, make sure all solids stay below the brine, out of view, until you’re ready to taste them.
Why Airlocks are Worth Using
Some home fermenters skip airlocks, but these little valves can make a huge difference, especially for active or longer ferments. An airlock’s job is simple: it lets out built-up gas while blocking oxygen, dust, or critters like fruit flies. Cutting down on air contact is important for flavor and food safety.
Most airlocks are made of plastic or glass and fit into rubber gaskets on special lids. As fermentation starts, carbon dioxide escapes through a water-filled chamber. There’s even a satisfying “bloop” sound that tells you things are working. You can find airlock kits to convert any mason jar into a mini fermenter for small batches at home.
I lost a couple of jars to fruit flies before I made the switch. It was pretty gross. Standard lid systems with airlocks put those worries to rest, and cleanup is a breeze.
- Water Airlocks: Classic bubbling lids, perfect for sauerkraut, kimchi, and even brewing small-batch mead.
- Silicone Lids or Valves: Automatic, easy to clean, and a perfect fit for most jars when making small quantities.
- DIY Airlocks: A jar lid with a small pinhole and some plastic wrap may work in a pinch, though storebought airlocks are less messy and more consistent.
A Step-By-Step Guide to Using Weights and Airlocks
Ready to get started? Here’s my simple method for putting these tools to use:
- Pack Your Jar: Stuff your veggies tightly into a sanitized jar and cover with brine. Press everything down as much as you can.
- Add the Weight: Put the clean weight directly on top of your veggies, pushing them below the brine. Eliminate any floating pieces or bits clinging to the walls of the jar.
- Set Up the Airlock: Attach a fermenting lid with airlock and water. Make sure everything seals evenly, but don’t twist too tightly. The goal is to let gas escape smoothly.
- Ferment at Room Temp: Keep jars out of direct sunlight. For most ferments, 60-75°F (15-24°C) is a good target temperature. Consistency is key for flavor and crunch.
- Monitor Activity: In a day or two, expect bubbles or the familiar “bloop.” That’s your sign things are rolling along nicely.
I give my jars a daily glance to check that food stays under the brine and that the airlock still has water. A moment of care now helps you avoid any unexpected issues later.
Common Mistakes and How to Avoid Them
- Food Popping Above the Brine: Sometimes, little pieces sneak out. I place an extra cabbage leaf or veggie slice over the top to catch stragglers and hold them down.
- Forgetting to Top Up Water in the Airlock: With heat or long ferments, water evaporates. Keep a dish of filtered water handy for topping up as needed.
- Rusty Metal Tools: Only use stainless steel or plastic in salty, acidic environments. Regular metal rusts and can change your ferment’s flavor.
- Skimping on Cleaning: Rinse and dry weights and airlocks between uses. A quick scrub with hot water goes a long way for safety and taste.
Stay attentive, and these small issues are easy fixes. If you spot small spots or a harmless white film called Kahm yeast, just scoop them out—they don’t mean all is lost.
Choosing the Right Gear: What to Look for
Picking fermentation gear isn’t complicated, but a few details matter:
- Perfect Fit: Choose weights that fit your jar’s opening, wide-mouth or narrow mouth, for snug contact.
- Safe Materials: Glass and glazed ceramic are sturdy, nonreactive, and easy to clean. Avoid porous or cracked items.
- Simple Cleanup: Dishwasher-safe weights and silicone airlocks take the hassle out of cleaning up.
Look for trustworthy brands with transparent materials and care instructions. Lots of handmade options are available—try a few to see what fits your kitchen style.
Improvising If You’re Just Starting
Not ready to invest in extra gear? Some quick DIY fixes can help when you’re starting out. Glass ramekins, food grade resealable bags filled with brine, or nested jars can keep food down, and a loose lid with a tiny hole works for gas release. In my experience, purpose-made gear gives more consistency for long-term fermenters, but don’t let lack of equipment stop you from getting started—it’s about learning!
Hands-On Experience: What to Expect When Using Weights and Airlocks
From my kitchen experiments, a few benefits stand out right away:
- Way fewer issues with mold: Keeping air away from the food means a cleaner, better-smelling ferment.
- Superior crunch: Vegetables stay snappy and colorful when below the brine, even after long fermentation.
- More confidence: Peace of mind comes from knowing the process is less likely to go sideways. Messes and spoilage drop off quickly.
Fermentation has an artistic side, but hard-won practical tips like these help you preserve more food with less frustration. Every improvement moves you closer to tasty, reliable batches.
Popular Types of Ferments That Benefit Most
- Sauerkraut, Kimchi, and Pickled Veggies: Crunchy, bulky veggies stay submerged, gas releases safely, and bright flavors shine.
- Cucumber Pickles: Floating pieces mean soft, off-smelling pickles. Weights and airlocks keep things crisp and fragrant.
- Hot Sauces and Salsas: Fresh peppers and blended veggies ferment evenly with less risk of spoilage.
Almost anything that sits in brine at room temperature for more than a few days—including traditional pickles, carrot spears, and beans—gets a boost from these simple tools. Quick ferments or fast, daily-stirred recipes may not need them, but classic, hands-off fermentation always benefits.
Frequently Asked Questions
How do I clean fermentation weights and airlocks?
Rinse thoroughly with hot, soapy water, and let them dry completely. Glass options often handle the dishwasher, making things even easier.
Can I ferment without these tools?
Technically, yes, but the chance of mold, fruit flies, and inconsistent batches is much higher. Improvised setups work for beginners, but investing in a real kit makes life simpler and your results more reliable.
Are fermentation weights and airlocks just for pickles?
Nope! Use them for sauerkraut, hot sauce, kimchi, carrot ferments, even small-batch mead or pepper sauces. If your recipe needs a low-oxygen environment, these tools help out a lot.
Getting Started With Confidence
Adding fermentation weights and airlocks to your setup is one of the easiest ways to guarantee cleaner, crunchier, and more consistent results. My advice? Try a few approaches to see what feels right, and don’t hesitate to experiment as you gain more experience. With some quick setup and the right gear, you’ll enjoy better ferments on the first try and every batch after. Have fun witnessing—and tasting—the difference these tools can make in your kitchen adventure!