
This kombucha brewing guide for beginners walks through one safe first batch: sweet tea, a SCOBY, starter tea and a clean glass jar. Enough starter tea keeps the brew acidic, which protects it while it ferments. Healthy growth looks wet and smooth or bumpy; mold looks dry, fuzzy and coloured.
What do you need to brew kombucha at home?
You need a glass jar, a breathable cover, plain tea, plain sugar, water, a SCOBY with starter tea, and a way to check acidity. Nothing here is specialist equipment, and most kitchens already have half of it.
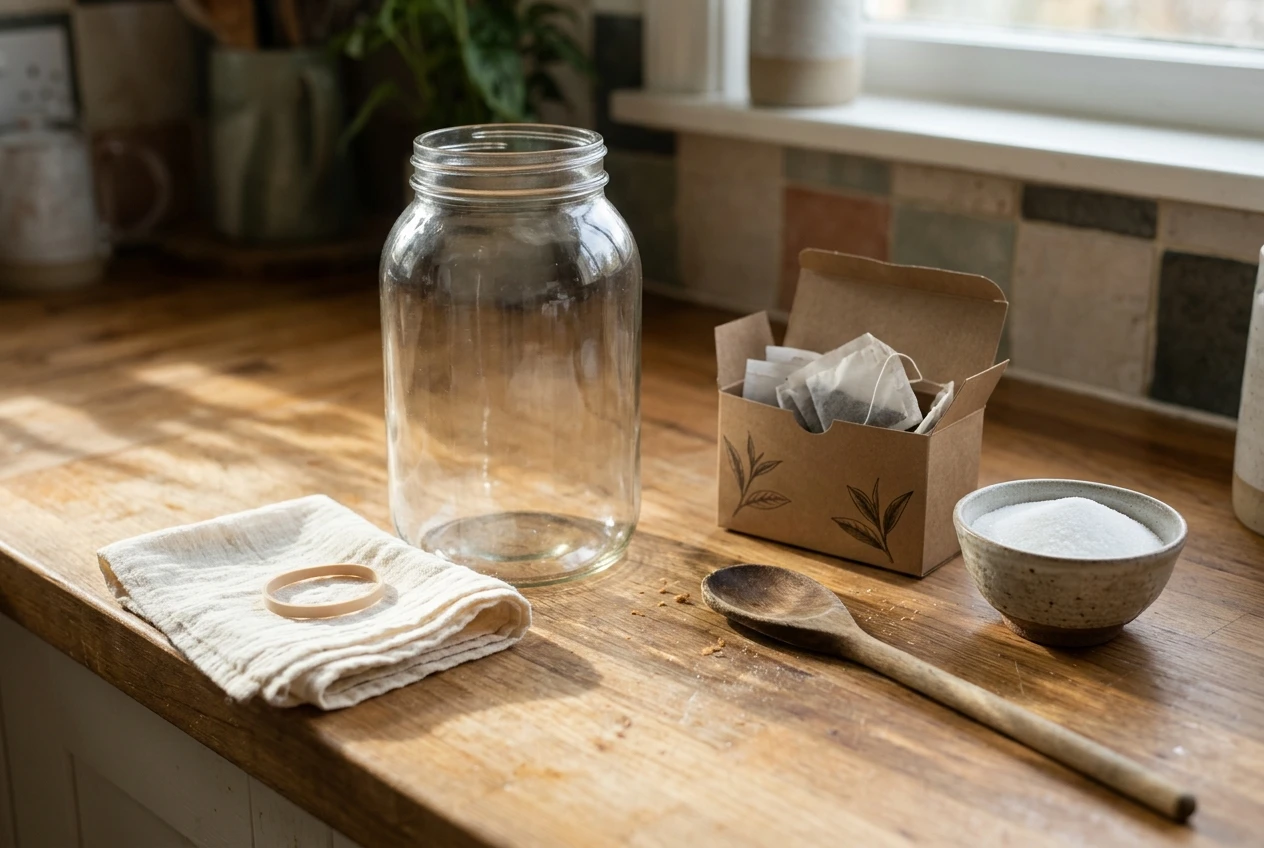
Equipment
- A wide-mouthed glass jar of about 2 litres (half a gallon). Wide mouths give the surface room to grow a new SCOBY and make cleaning easy.
- A tightly woven cloth, a coffee filter or a paper towel, plus a rubber band, to keep fruit flies out while letting air in.
- A large pot for boiling water.
- A long wooden or stainless steel spoon.
- pH test strips. These are optional but cheap, and they remove a lot of guesswork.
Ingredients
- 1.5 litres of water. Filtered water is fine, and tap water works if you let it sit uncovered for a while so chlorine can dissipate.
- About 80 g (6 tablespoons) of plain white sugar.
- 4 bags of plain black tea, or the equivalent in loose leaf. Green tea also works.
- A SCOBY and about 150 ml of starter tea (the acidic kombucha liquid it comes in).
Avoid flavoured teas, especially anything with oils such as Earl Grey, and avoid honey or sugar substitutes for your first batch. Those can weaken or damage the culture. Keep the jar out of reactive metals too. Glass is the safest container for the long ferment.
How do you get a healthy SCOBY and starter tea?
You can buy a SCOBY with its starter tea, get one from another home brewer, or grow one from a bottle of raw, unflavoured kombucha. Whichever route you pick, the starter tea matters as much as the SCOBY, because its acidity is what protects the new batch.
A SCOBY (symbiotic culture of bacteria and yeast) is the rubbery, pancake-like disc that floats in or sits at the top of the jar. It is cellulose produced by the bacteria, and the yeast and bacteria living in the liquid do the actual fermenting. The disc is the visible part of a larger culture.
Option 1: Buy or receive a SCOBY
A reputable supplier or an experienced brewer will give you a SCOBY packed in starter tea. Look for a pale cream to tan disc in clear, sour-smelling liquid. If it arrives dried out, fuzzy, or smelling of anything other than vinegar, do not use it.
Option 2: Grow one from a bottle
Buy a bottle of raw, unpasteurised, unflavoured kombucha from a shop. Pasteurised or flavoured bottles will not work, as the culture is dead or altered. You will often see small strands or a thin film in a good raw bottle, which is a good sign.
To grow a SCOBY:
- Brew sweet tea as described in the next section and let it cool fully to room temperature.
- Pour it into your jar and add the whole bottle of kombucha.
- Cover the jar and leave it somewhere warm, around 22 to 27°C (72 to 80°F), out of direct sunlight.
- Wait. A thin, clear film usually appears on the surface within a week or two, and it thickens over the following weeks into a proper SCOBY. Patience is normal here, and the timing varies with warmth.
Growing from a bottle takes longer than buying a SCOBY, and the first weeks are when beginners worry most. The identification section below covers what you are looking at.
How do you brew your first batch of kombucha, step by step?
Make sweet tea, cool it completely, add the starter tea and SCOBY, cover the jar and leave it somewhere warm for about one to two weeks. The order matters, because hot tea kills the culture and too little starter tea leaves the batch vulnerable.
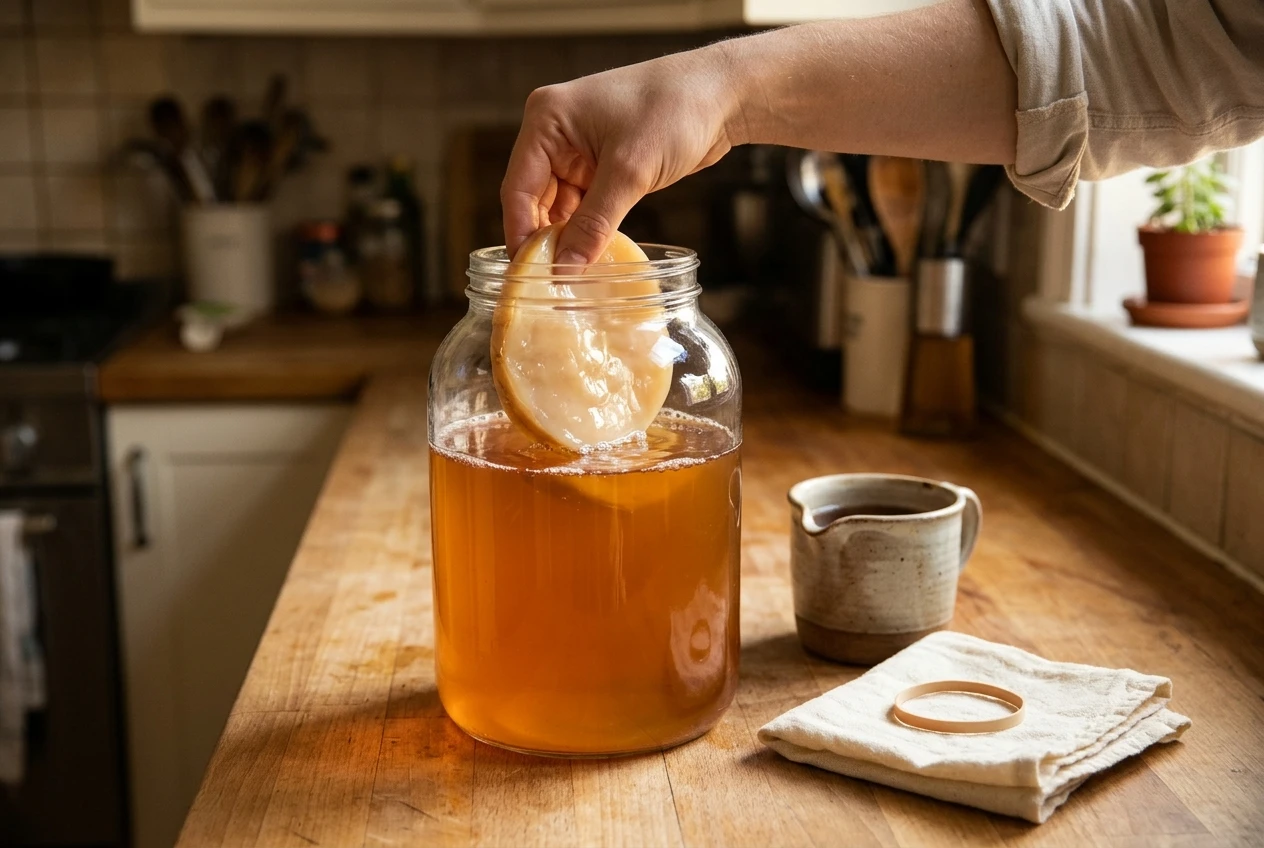
- Clean everything. Wash the jar, spoon and your hands with hot water and unscented soap, then rinse very well. Soap residue can harm the culture. Avoid antibacterial sprays near the jar.
- Boil the water. Bring the 1.5 litres to a boil in the pot, then take it off the heat.
- Dissolve the sugar. Stir in the 80 g of sugar until it disappears.
- Steep the tea. Add the tea bags and leave them for about 10 minutes, then remove them. Squeezing the bags is not necessary.
- Cool it completely. The tea must be at room temperature before it meets the SCOBY. Test it with a clean finger or a thermometer. Warm tea damages the culture, so wait if you are unsure.
- Add starter tea first. Pour the cooled tea into the jar, then add 150 ml of starter tea. Adding the starter before the SCOBY lowers the pH straight away.
- Add the SCOBY. Slide it in with clean hands. It may sink, float sideways or hover in the middle. All of these are normal.
- Cover and place the jar. Secure the cloth with the rubber band. Choose a spot between roughly 20 and 27°C (68 to 80°F), out of direct sun, and where it will not be jostled daily.
- Wait and check. Look at the jar each day without stirring or moving it.
If you have pH strips, test the liquid once the SCOBY is in. A reading of 4.6 or below is the commonly cited safety threshold, and lower is better. If your batch starts above that, add a little more starter tea or, failing that, a splash of distilled white vinegar to bring it down.
How can you tell a healthy SCOBY from mold?
Healthy SCOBY growth is wet, smooth or lumpy, and cream, tan or light brown. Mold is dry, fuzzy or powdery, and sits on top of the surface in white, green, blue or black patches. If you see mold, throw away the whole batch, SCOBY and liquid included.
Fear of mold stops many people before they start, and much of that fear comes from healthy kombucha looking strange. A new SCOBY can look unsettling, so here is what to expect.
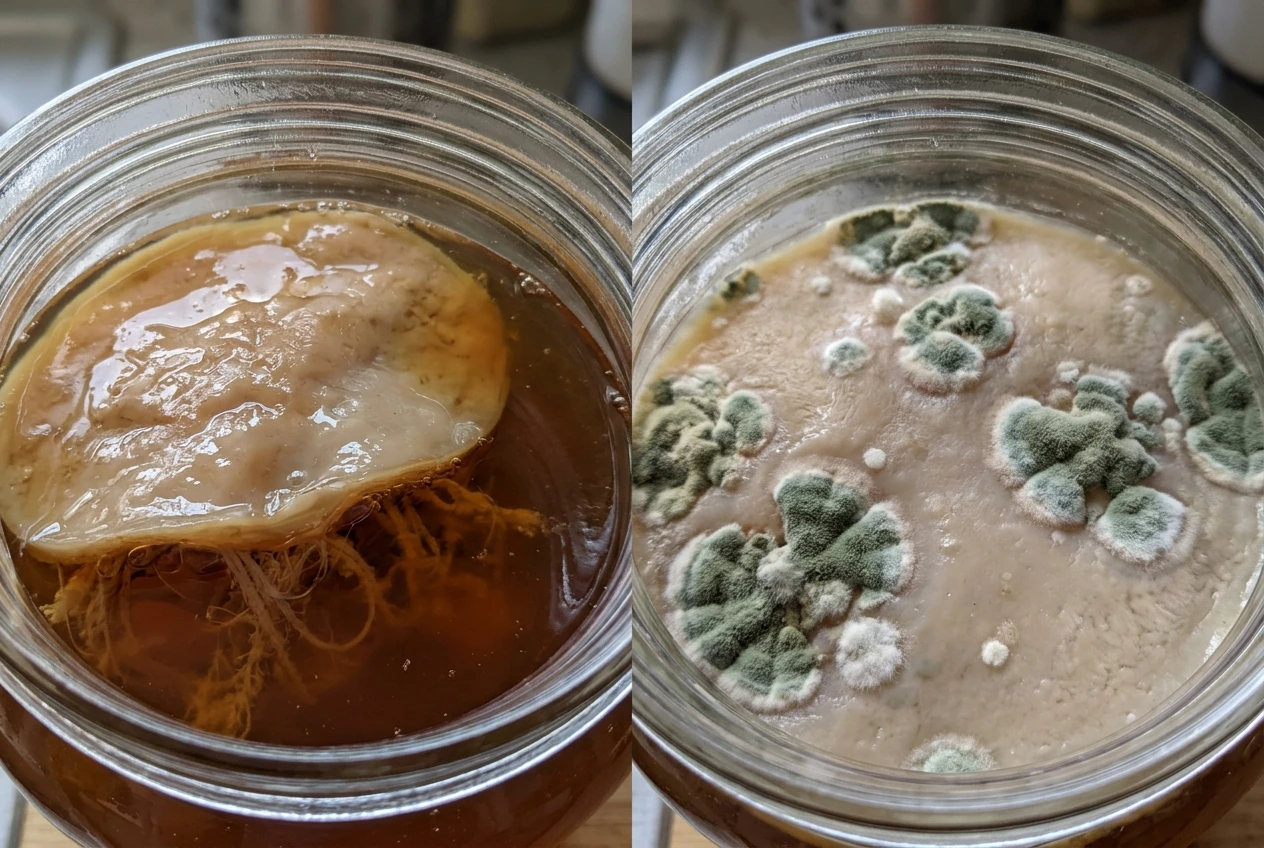
What you see What it is What to do Brown, stringy bits hanging below the SCOBY or floating Yeast strands Normal. Leave them. Clear, jelly-like film forming on the surface A new SCOBY beginning Normal. Do not disturb it. Bubbles on or under the SCOBY Active fermentation Normal and a good sign. Lumpy, bumpy or uneven surface, even with holes Uneven growth Normal. Appearance is not a measure of safety. Darker brown patches on the SCOBY, wet and smooth Tea or yeast residue Normal. Dry, fuzzy or powdery spots, raised above the surface Mold Discard everything. White, green, blue or black fuzz Mold Discard everything. Pale, flat, dusty white patches that look like cobwebs Possible mold Look closely, and discard if in doubt.
Mold grows on the surface where it meets air, and it looks like what you would find on old bread: raised, dry and fuzzy, often in circles. Yeast and new SCOBY growth are wet and sit flush with the liquid. If you can lift a patch with a clean spoon and it is slimy or gelatinous underneath, it is probably culture. If it looks like fur, it is mold.
Smell helps too. Healthy kombucha smells tart and vinegary, a bit like cider. A rotten, cheesy or nail-polish-remover smell means something has gone wrong.
When in doubt, do not drink it. Starting again with a fresh SCOBY and a thoroughly cleaned jar costs very little compared with the worry of guessing.
How do you know when your kombucha is ready to bottle?
Your kombucha is ready when it tastes pleasantly tart with some sweetness left, which is usually between 7 and 14 days at normal room temperature. Taste it rather than counting days, because warmth speeds fermentation and cool rooms slow it.
Start tasting around day 7. Pull back the SCOBY with a clean hand and draw out a little liquid with a clean straw or spoon. Do not use the same utensil twice without washing it.
- Too sweet, like cold sweet tea: it needs more time. Check again in a day or two.
- Tart with a trace of sweetness: this is the usual sweet spot for most beginners.
- Sharply sour, like vinegar: it has over-fermented. It is safe to drink in small amounts, to use in salad dressings, or to keep as strong starter tea for your next batch.
If you have pH strips, a reading between about 2.5 and 3.5 indicates a well-fermented, safely acidic kombucha. Warm rooms ferment fastest, so a jar in a hot summer kitchen may be ready in under a week.
Before bottling, set aside at least 150 ml of the liquid from the top of the jar as starter tea for your next batch. The SCOBY itself stays in the jar, along with that starter.
How do you bottle and flavour kombucha safely?
Pour your finished kombucha into clean, sturdy bottles, optionally add fruit or juice, seal them and leave them at room temperature for two to three days to build fizz, then refrigerate. The sealed stage is where the main safety risk sits, because pressure builds inside the bottle.
This is called second fermentation. The leftover sugar, and any fruit you add, feeds the remaining yeast in a closed container, producing carbon dioxide.
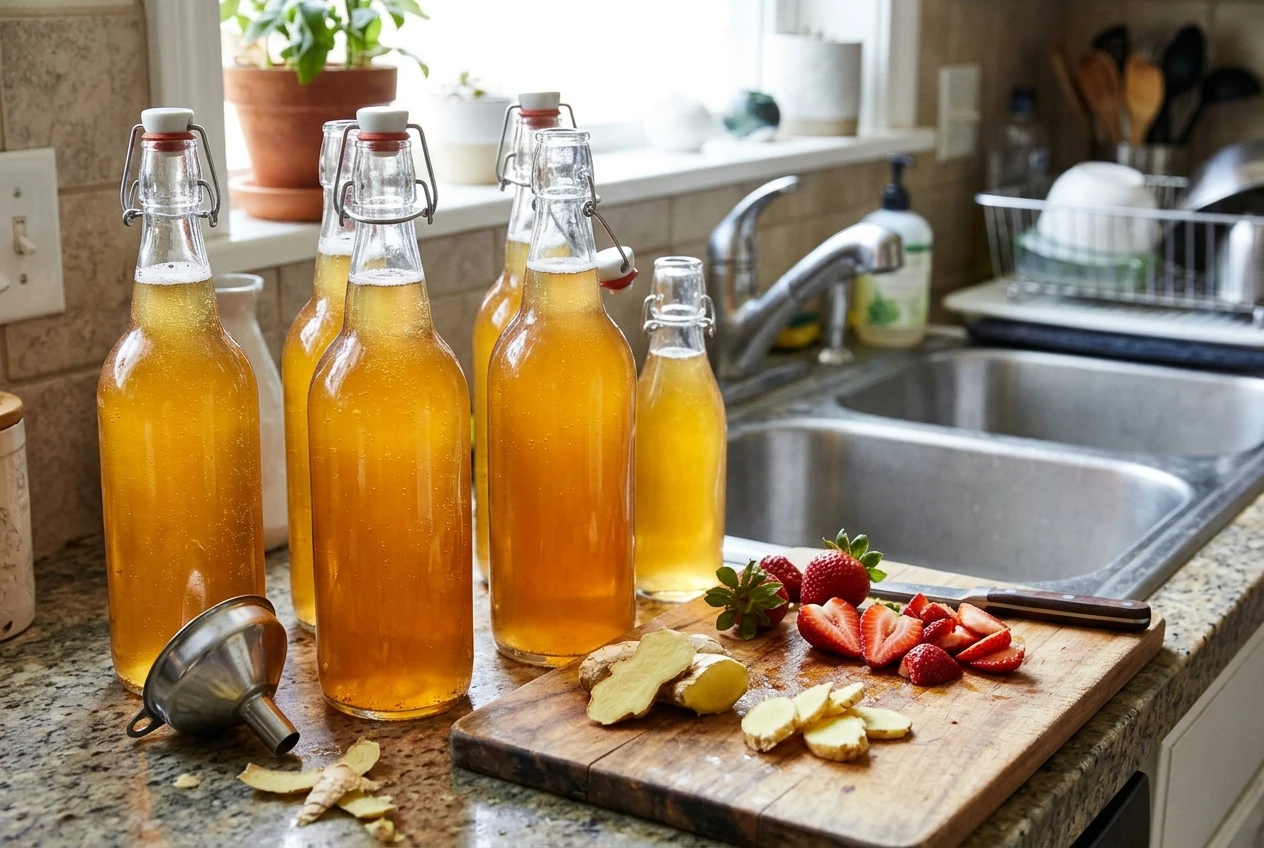
- Choose proper bottles. Use flip-top (swing-top) bottles made for fermenting, or clean glass bottles with screw caps designed to hold pressure. Avoid thin decorative glass and old jars that were never meant to be sealed under pressure.
- Leave headspace. Fill each bottle to about 2 to 3 cm (an inch) below the top so there is room for gas.
- Add flavour, if you like. A few pieces of fruit, a spoonful of juice or a slice of fresh ginger is plenty. Use a small amount, as more sugar creates more pressure.
- Seal and wait. Leave the bottles at room temperature, out of sunlight, for two to three days.
- Check carbonation. Open one bottle slowly over a sink. If it fizzes well, move all the bottles to the fridge. If not, leave them another day.
- Refrigerate. Cold slows fermentation and keeps the fizz at a steady level.
Chill bottles before opening, and always open them slowly, pointed away from your face and over the sink. Over-carbonated kombucha can foam out fast. If a bottle feels rock hard or the cap bulges, refrigerate it for several hours before you even touch the cap.
Kombucha always contains a trace of alcohol from fermentation. Homemade batches can vary, so if you are pregnant, avoiding alcohol, or have a health condition, check with a doctor or pharmacist before drinking it.
What are the most common beginner mistakes, and how do you fix them?
Most first-batch problems come from too little starter tea, tea that was still hot, a jar that is too cold, or bottles sealed with too much sugar inside. Each one has a simple fix.
- Adding the SCOBY to warm tea. Heat harms the culture. Always cool the tea to room temperature first, and if you have doubts, start again with a fresh batch of tea.
- Using too little starter tea. The liquid stays higher in pH for longer, which gives mold a chance. Use about 10 percent of your batch volume as a minimum and add it before the SCOBY.
- Brewing in a cold spot. Below about 20°C (68°F), fermentation slows and the batch can sit sweet and vulnerable for weeks. Move the jar somewhere warmer, such as a shelf near (not on) a warm appliance, or a cupboard in a heated room.
- Using flavoured or herbal tea. Oils and additives can interfere with the culture. Switch back to plain black or green tea.
- Moving or stirring the jar constantly. Disturbing the surface can slow the formation of a new SCOBY. Leave it alone and look at it daily.
- Panicking over yeast strands. Brown, stringy bits are yeast. Only dry, fuzzy growth on the surface is a reason to discard.
- Sealing bottles with too much fruit or juice. Extra sugar means extra pressure. Use small amounts, leave headspace and check bottles after a day or two.
- Cleaning with antibacterial sprays. Residues can harm the culture. Hot water, unscented soap and a very thorough rinse are enough.
If your batch goes wrong, start again. A failed first batch costs a bit of tea and sugar, and each new attempt is easier because you now know what normal looks like.
Ready to ferment more than one thing? Read the Beginner’s Guide to Fermentation for the basics that apply to every ferment.