
To start a sourdough starter from scratch, mix equal weights of flour and water in a clean jar, cover it loosely, and keep it somewhere warm. Each day, discard most of it and feed it fresh flour and water. Expect it to become reliably active in about one to two weeks, longer in a cool kitchen.
What do you need to start a sourdough starter?
You need flour, water, a jar, a kitchen scale and a way to cover the jar loosely. That is the whole list. If fermentation is new to you, the beginner’s guide to fermentation covers the basics of what is happening in the jar.
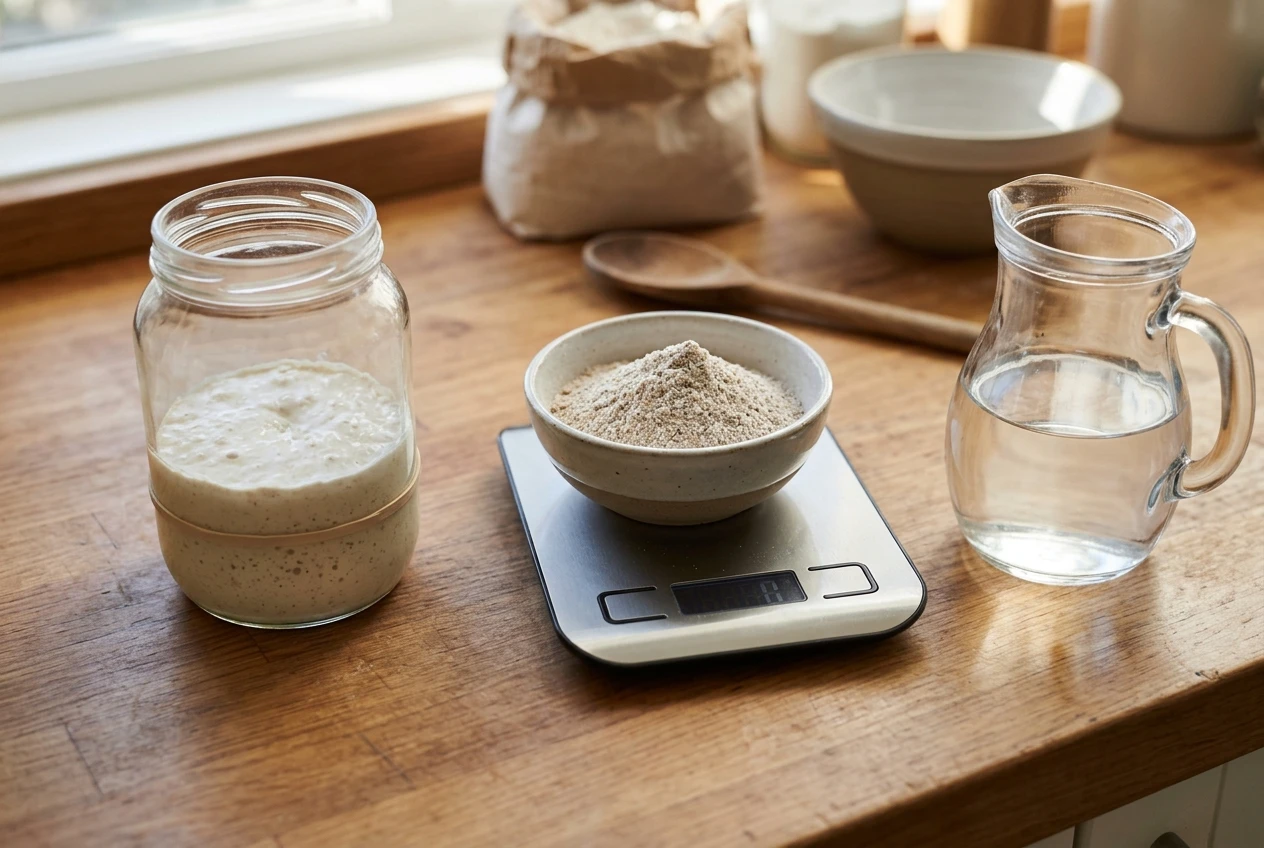
- Flour: Whole wheat or rye flour is the easiest choice for the first week, because whole grains carry more of the microbes and nutrients that get a starter going. After the starter is established you can switch to plain white flour if you prefer.
- Water: Use water you would happily drink. If your tap water smells strongly of chlorine, leave it in an open jar for several hours first, or use filtered water.
- A jar: A clean glass jar of 500 ml to 1 litre works well. Wide-mouthed jars are easier to stir and clean.
- A scale: Weighing is more reliable than cups, because a cup of flour can vary a lot in weight. Equal weights of flour and water is the standard ratio.
- A loose cover: A lid set on top without tightening, a plate, or a cloth held with a rubber band all work. The starter produces gas, so a sealed jar is not a good idea.
- A rubber band or marker: Put it around the jar at the level of the starter after each feeding. It shows you how much the starter rises, which is more telling than bubbles alone.
How do you make a sourdough starter, day by day?
You make a starter by feeding the same small batch of flour and water once a day, and the first week usually follows a recognisable pattern. The days below are a guide, not a schedule. Warm kitchens move faster and cool ones slower.
Day 1: mix. Stir 50 g of whole wheat or rye flour and 50 g of water in the jar until no dry flour remains. The mixture will look like a thick paste. Cover loosely, mark the level, and leave it somewhere that stays roughly 24 to 27°C if you can manage it. Nothing visible will happen yet.
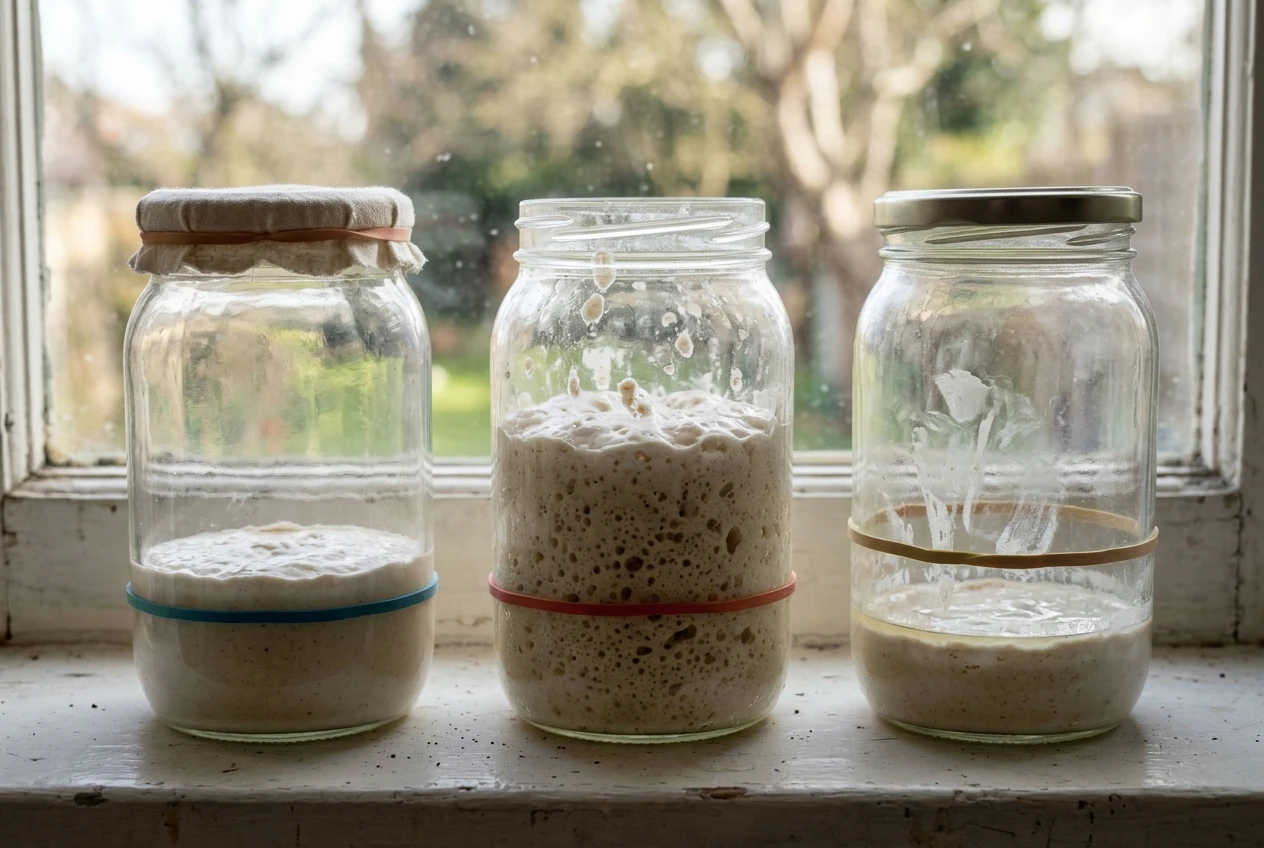
Day 2: feed, even if nothing happened. You might see a few small bubbles, or you might see nothing at all. Both are normal. Remove all but about 50 g of the mixture, then stir in 50 g of flour and 50 g of water. Mark the level again.
Day 3: expect the first burst. Bubbles often appear now, the starter may rise, and the smell can turn odd. People describe it as sweaty, cheesy, or like nail polish remover. This early activity comes mostly from bacteria that thrive in fresh flour paste, not from the yeast and acid-loving bacteria that make a good sourdough. Feed as before: keep 50 g, add 50 g flour and 50 g water.
Day 4: keep feeding. The starter may look lively or it may already be slowing. Do not judge it yet. Repeat the same feeding at about the same time of day.
Days 5 to 6: the quiet phase. Many beginners quit here. The bubbles drop away, the starter looks flat, and it may smell like wet flour or nothing much. The next section explains why this happens and why it is not a failure. Keep feeding once a day.
Days 7 to 10: activity returns. Bubbles come back, this time throughout the mixture and not only at the surface. The smell shifts from odd to tangy, a bit like yogurt or mild vinegar. The starter starts to rise noticeably after each feeding and then falls back.
Days 10 to 14: strengthening. The rise gets taller and faster, and the texture turns airy and slightly stringy when you stir it. At this point you can feed it twice a day if your kitchen is warm and the starter seems hungry, meaning it peaks and falls in well under 12 hours.
Each day, use the same routine: discard down to 50 g, add 50 g flour and 50 g water, stir well, scrape down the sides, mark the level. Discarding keeps the jar from overflowing and keeps the amount of fresh food in proportion to the microbes.
What should a healthy starter look and smell like?
A healthy starter has bubbles of different sizes through the whole mixture, a slightly domed top after feeding, and a pleasant tangy smell. When you stir it, it should feel stretchy and aerated. The smell changes through the week, so what counts as normal depends on the day.
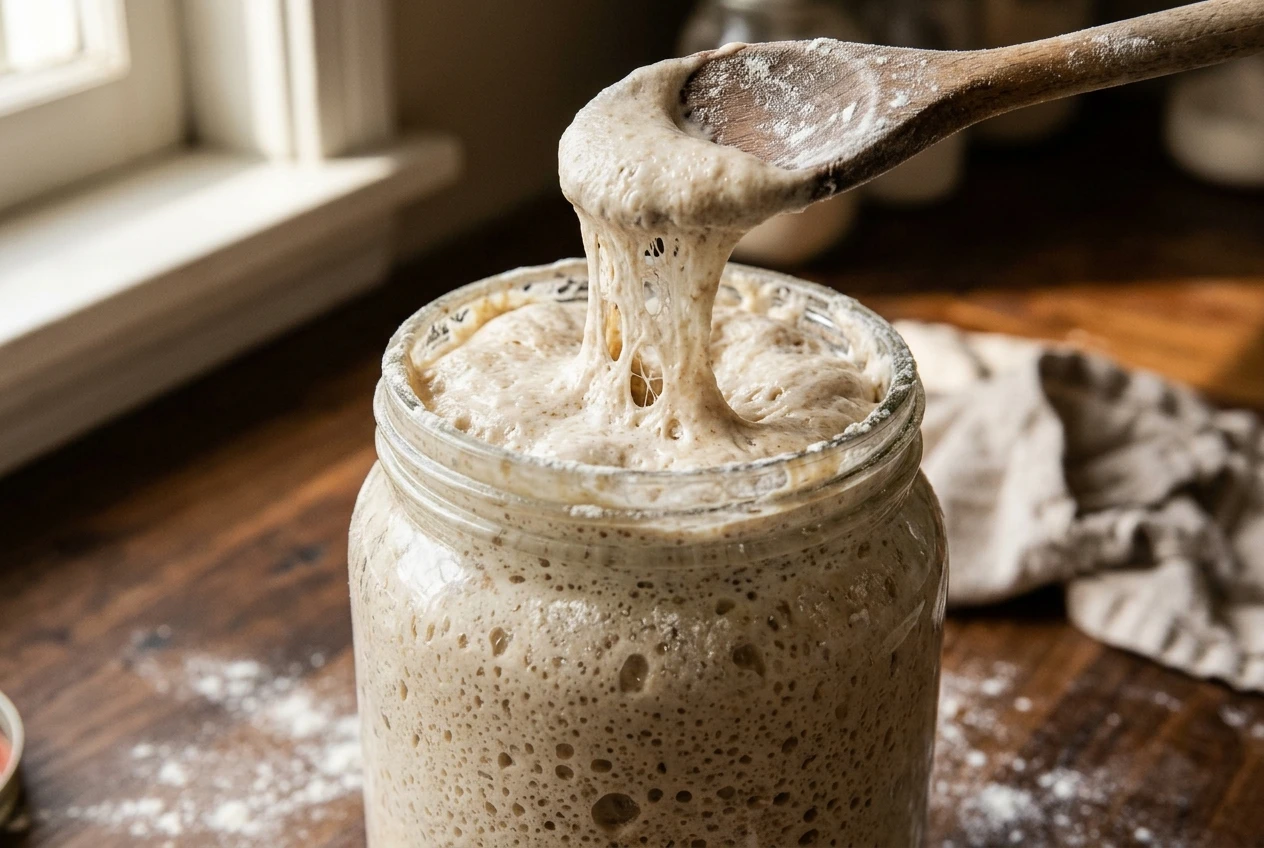
Some things look alarming but are fine. Others are a reason to start over.
What you see or smell What it means What to do Sharp, cheesy or sweaty smell in the first few days Early bacteria, which fade as the mixture becomes acidic Ignore it and keep feeding Grey or brownish liquid on top A hungry starter; this liquid is often called hooch Stir it in or pour it off, then feed, and feed sooner next time Dry skin on the surface Cover is too loose or the air is dry Stir the skin in or remove it, and cover more snugly Smell of acetone or strong alcohol later on The starter is very hungry Feed it more often Fuzzy spots in white, green, blue or black Mould Throw it all out and start again with a clean jar Pink or orange streaks Contamination Throw it all out and start again
A starter that smells sour is not spoiled. Sourness is the point. Visible mould or pink and orange streaks are the cases where you discard everything.
Why did my starter stop bubbling, and is it dead?
A starter that stops bubbling around day 4 to 6 is almost never dead. This pause is a well-known part of the process. The first bacteria that produced the early bubbles make the mixture more acidic, which slows them down. The yeasts and lactic acid bacteria that suit sourdough take longer to build up, so there is a gap between the two groups.
During this gap, keep feeding at the same rate. Most starters that look dead are simply between populations.
If the quiet lasts more than a few days, check these causes:
- The kitchen is too cool. Below about 20°C, everything slows. See the next section.
- Chlorinated water. Switch to filtered water or water that has stood out for several hours.
- Only white flour. Replacing half or all of the flour with whole wheat or rye gives the microbes more to work with.
- Too much discarded, too little left. Keep at least 50 g of the starter each time, and stir thoroughly so the fresh flour is mixed in.
- Inconsistent feeding. Missed days set a young starter back. Feed at roughly the same time each day.
A starter is only dead if it has mould or pink streaks, or if you have kept up good conditions for several weeks with no bubbles and no rise at all. That is rare.
How warm does a starter need to be, especially in a cool kitchen?
A starter works best at about 24 to 27°C, and it slows down noticeably below 20°C. That matters now that colder weather has arrived. A kitchen that held a steady 22°C in summer may sit at 16 or 17°C overnight in late autumn, so a starter that was fast in August can feel sluggish in November.
You do not need to give up. You can either warm the starter or accept a slower timeline.
Ways to warm it:
- Put the jar in the oven with only the oven light on. Check the temperature with a thermometer first, because some ovens get warmer than others. Leave a note on the door so nobody preheats the oven with the jar inside.
- Stand the jar on top of the fridge or near, not on, a warm appliance.
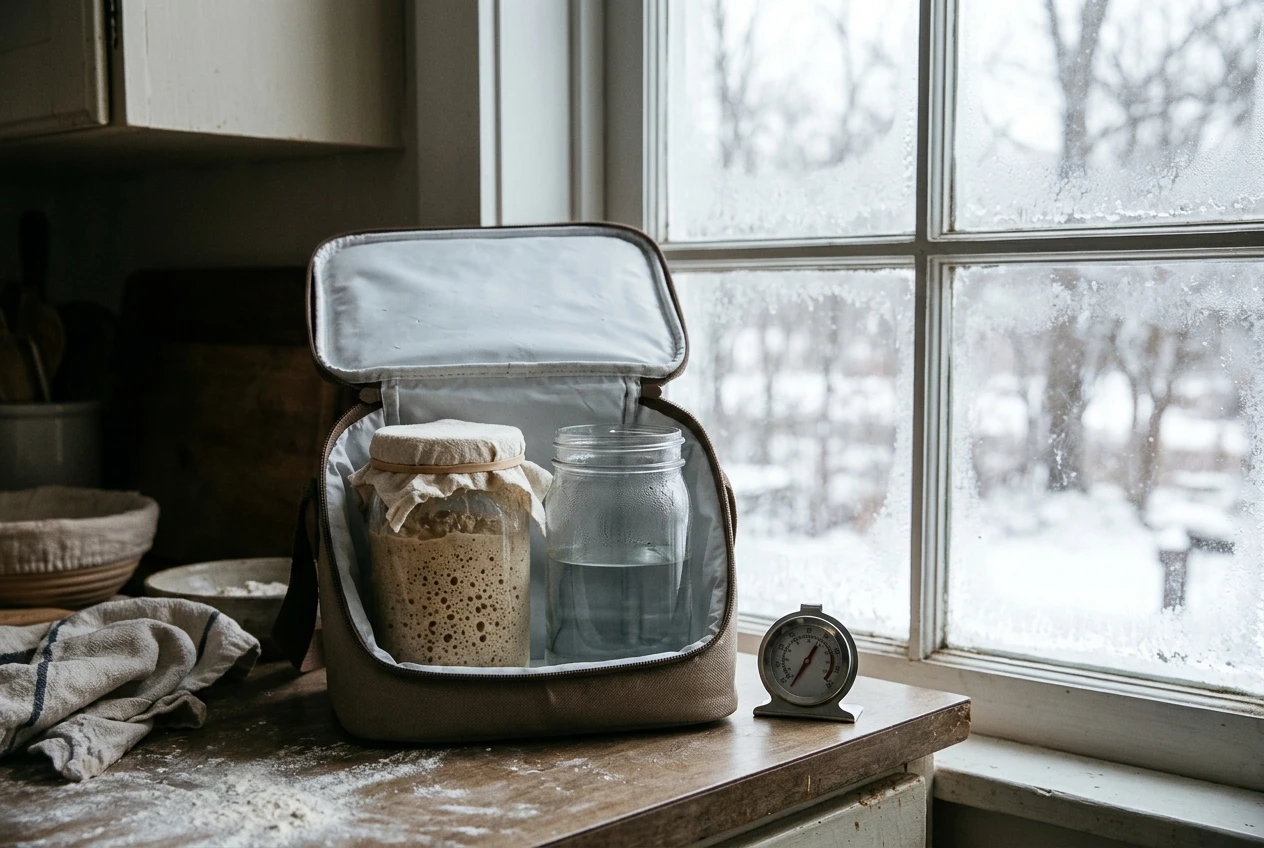
- Set the jar in a small insulated box or cooler with a second jar of warm water beside it. Refresh the warm water when it cools.
- Mix feedings with lukewarm water, around 30°C, which gives the starter a short warm boost each day.
If you cannot warm it, expect the process to take two to three weeks instead of one. Feed once a day, not twice, since a slow starter has less to digest. Be patient with the quiet phase, which will probably last longer too. For more on how cold weather changes fermenting in general, see winter fermentation: what to make and what to expect.
How do you know when your starter is ready to bake with?
Your starter is ready when it reliably doubles in volume within about 4 to 8 hours of feeding, and does so for several days in a row. One good rise is not enough. A young starter can have a strong day and then fade, so look for consistency.
Check for these signs:
- It rises predictably. After a feeding, the level climbs to at least double the rubber band mark, then eventually domes and starts to dip at the centre.
- It is full of bubbles. The sides of the jar show bubbles, and the surface looks airy, not flat.
- It smells pleasantly tangy. Fresh, yeasty and slightly sour, not harsh or like solvent.
- It collapses on a schedule. When it peaks and then falls back, that is a sign it has used up its food, and the timing tells you when to feed next.
Some bakers use a float test, dropping a spoonful into water to see if it floats. It can be a useful hint, but it is not reliable on its own, since a starter can sink even when it is active enough to bake with. The rise is the better measure.
In a cool kitchen, a starter might need longer to double, perhaps 8 to 12 hours. If it still rises predictably, it can leaven bread, though the dough will ferment more slowly too.
How do you feed and store a starter once it is active?
Once the starter is active, you can keep it on the counter and feed it daily, or keep it in the fridge and feed it about once a week. The right choice depends on how often you plan to bake.
Counter storage. Feed once or twice a day, using the same routine as before: keep a small amount, add equal weights of flour and water, stir, and mark the level. This keeps the starter lively and ready to use at any time. It suits people who bake several times a week, and it works well in a warm kitchen.
Fridge storage. Cold slows the microbes right down. Feed the starter, let it sit out for an hour or two, then put it in the fridge with a loose lid. Feed it about once a week. The day before you bake, take it out, feed it, and leave it somewhere warm until it has risen and is bubbly. Then use it.
A few habits make this easier:
- Use the discard for pancakes, crackers or flatbreads, so it does not go to waste.
- Wash the jar every few days. Dried starter on the sides can harbour mould.
- If the starter has been in the fridge for a long time and has hooch on top, pour it off or stir it in, then feed it two or three times over a couple of days before baking.
- If you plan to be away, a well-fed starter will keep in the fridge for a while, and you can revive it with a few feedings when you return.
A starter is a living ferment that responds to temperature, flour and feeding, so it will behave a little differently in every kitchen. Watch the rise, trust the smell, and give it the time your kitchen needs.