

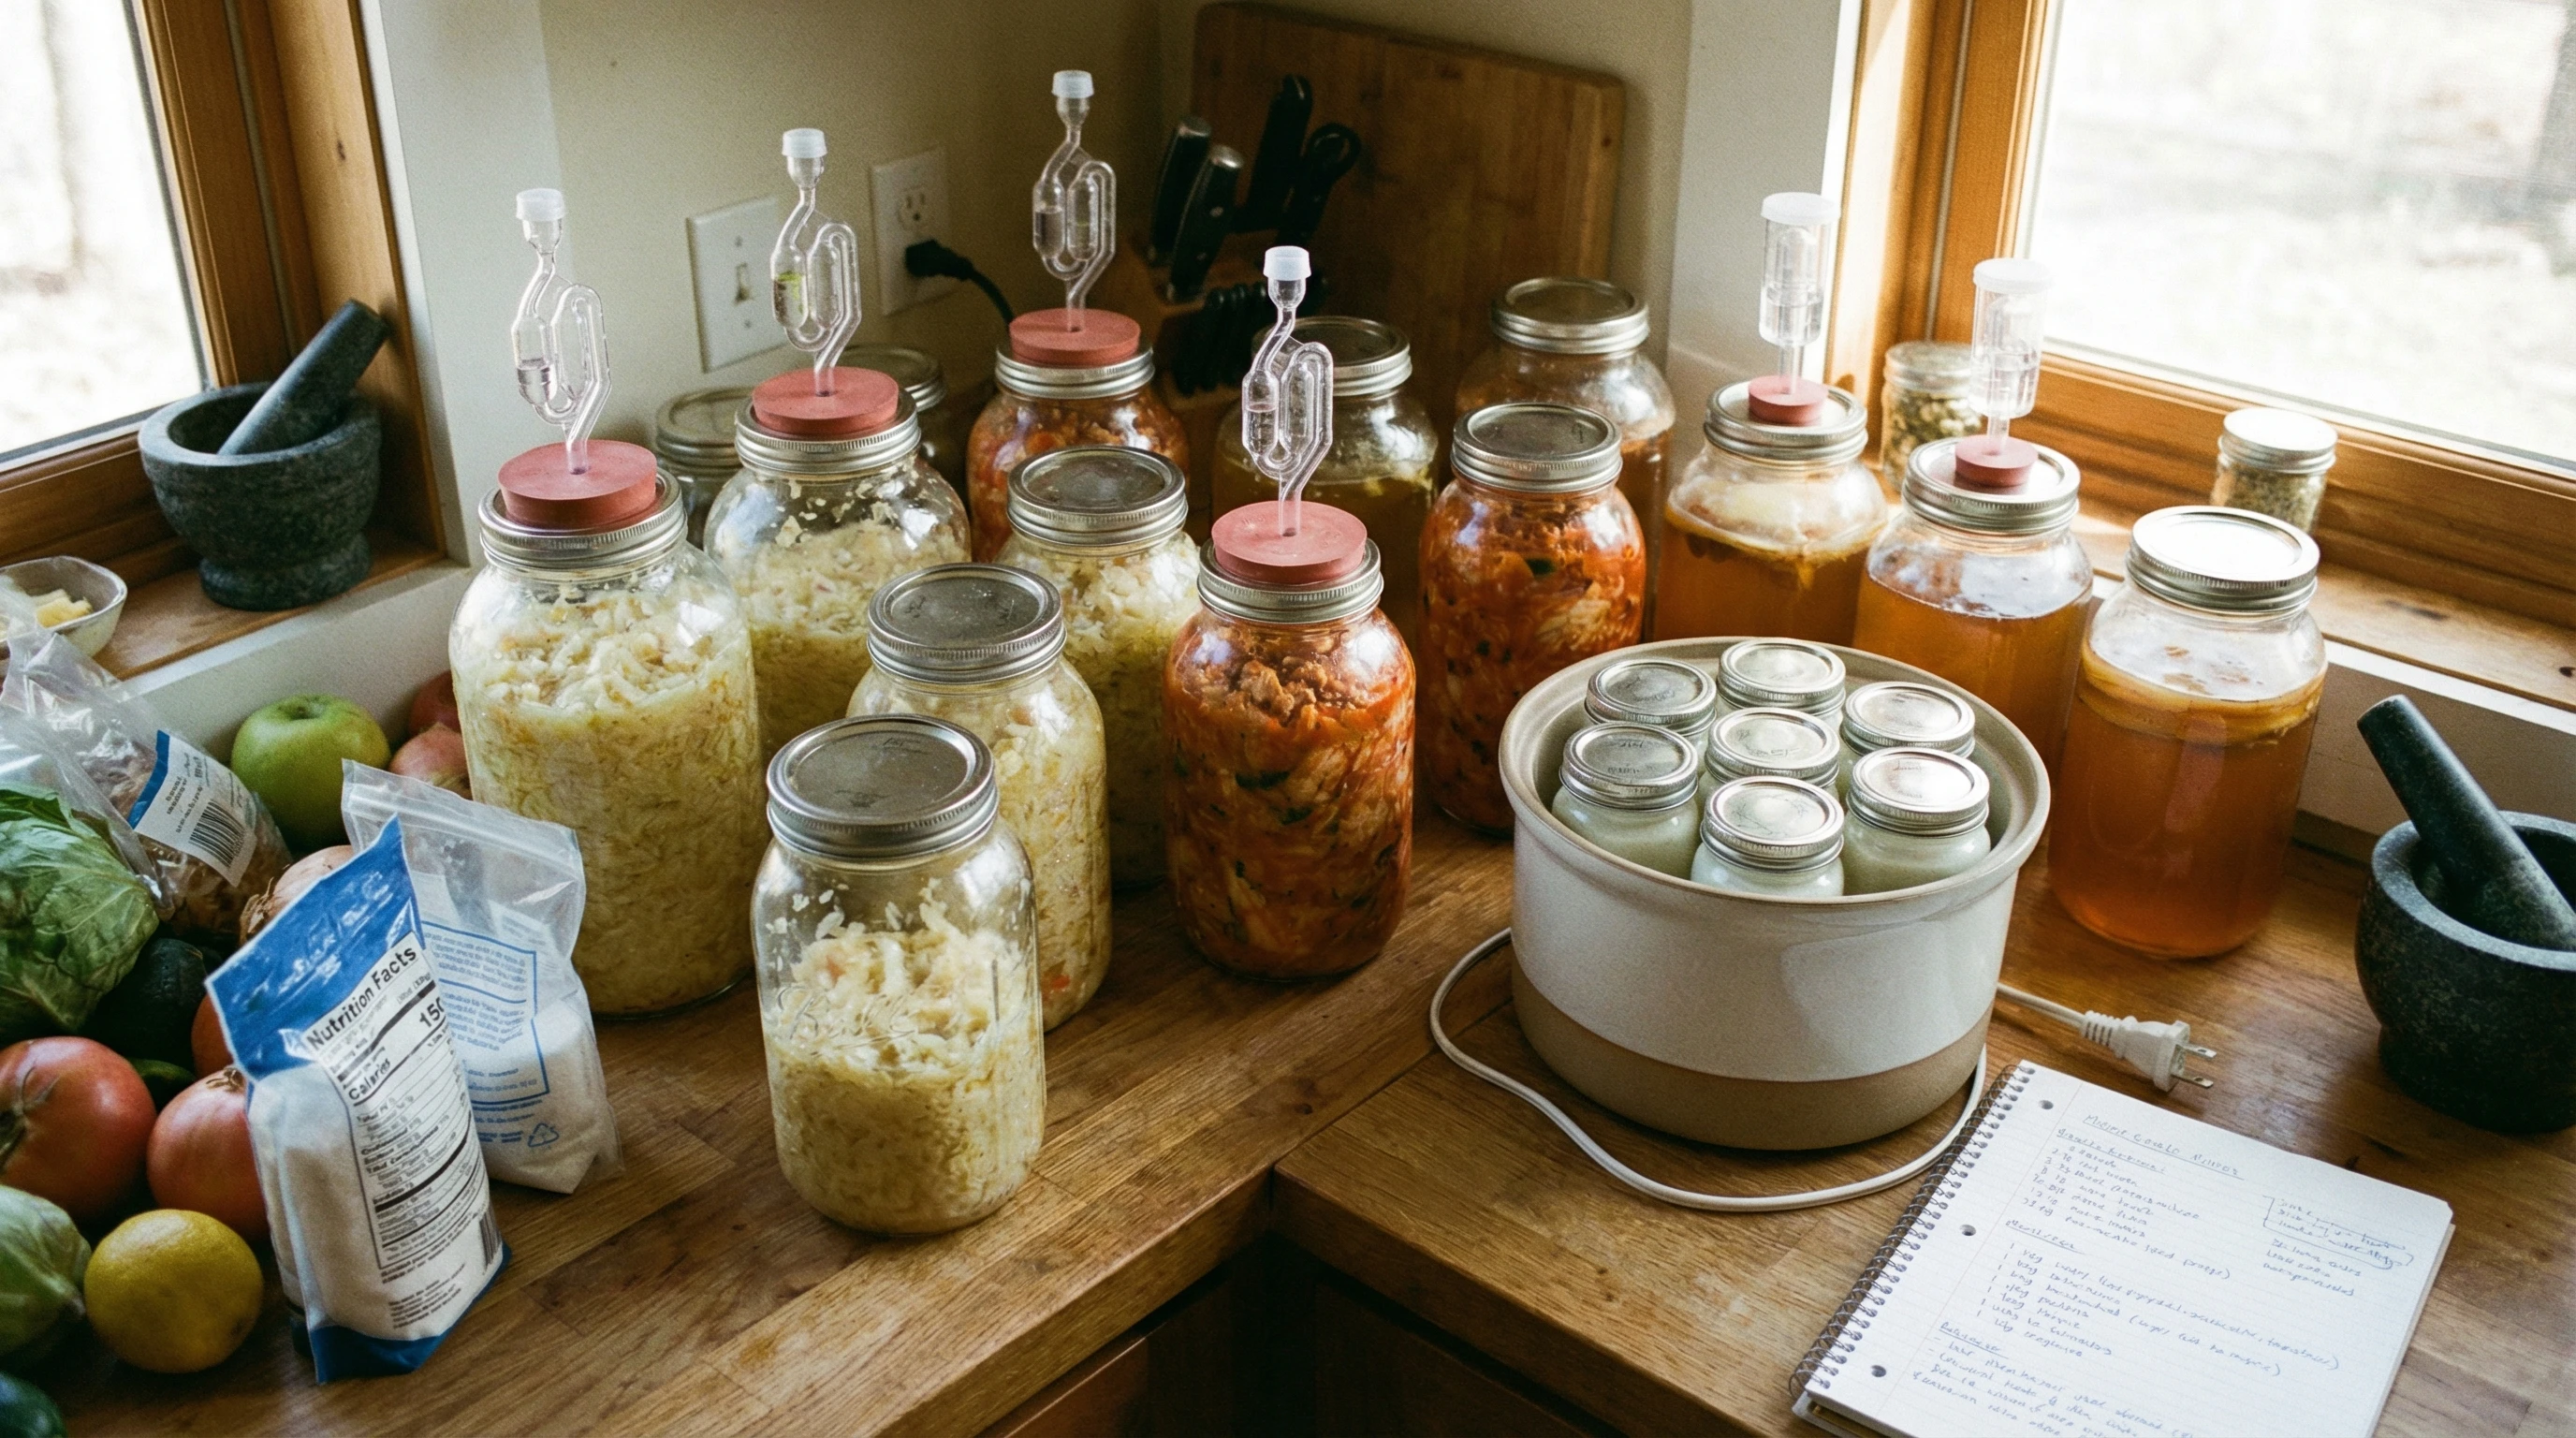
Getting into home fermentation opens up a whole new world of flavors you can’t really find in store bought foods. Crunchy pickles, tangy kimchi, and creamy yogurt all taste different when you make them at home. Picking the right home fermentation equipment makes the whole process a lot smoother, so it’s worth knowing what gear is really useful when starting out. I’m going to break down the basics, call out some key tools like wide mouthed jars, airlocks, and yogurt makers, and share some things I’ve learned along the way.
Fermentation Basics: Getting Set Up at Home
Fermentation uses good bacteria to transform food and lock in new flavors. This process has been a staple in kitchens for centuries, but a few simple tools make things way easier today. You don’t need fancy or expensive gadgets to get started, just a few practical tools that help you keep things clean, simple, and safe.
Bacteria and yeast do most of the work, whether you’re fermenting veggies, brewing kombucha, or trying your hand at homemade yogurt. These friendly microbes need a cozy, oxygen free environment to thrive. That’s where having the right equipment really pays off.
I’ve found that the classic setup with jars, airlocks, yogurt makers and yogurt starters covers pretty much all the basics for vegetable ferments, dairy, and even some simple drinks.
Essential Home Fermentation Equipment for Beginners
A starter fermentation kit doesn’t have to be large or expensive, but some tools truly make the job easier. The following are the items I almost always reach for when I’m starting a new batch:
- Wide Mouthed Glass Jars: Perfect for just about any small batch ferment. Easy to fill, stir, and clean. They come in sizes ranging from pint to halfgallon, so you’ll find one for almost any project.
- Fermentation Weights: These keep your veggies submerged below the brine, which prevents mold and ensures an even ferment. Glass, ceramic, or foodsafe stone weights all work well.
- Airlocks and Lids: An airlock lid lets gas escape but keeps air out. This means your ferments don’t end up with weird “off” flavors or surface mold. Regular screw top lids can work, but dedicated airlock lids are super handy for hands off fermenting.
- Yogurt Makers and Starters: When you want consistent and creamy yogurt, a simple yogurt maker takes out the guesswork. Paired with a reliable starter culture, you get smooth results every time.
- Tamper or Vegetable Pounder: Compressing veggies like cabbage or cucumbers into jars gets rid of extra air and helps everything break down evenly. A wooden or plastic tamper is easy on your hands and jars.
Using Wide Mouthed Jars: Why They’re Handy
Wide mouthed jars are a big upgrade from regular canning jars when you’re doing ferments. I use them for everything from sauerkraut to dill pickles because the larger opening makes scooping, packing, and cleaning much less of a hassle. The glass also lets you keep an eye on what’s happening inside so you can spot bubbles, cloudiness, or any issues right away.
They come in lots of sizes, but I like the quart or halfgallon versions for most veggie ferments. You can sterilize them in your dishwasher or with boiling water, and most standard fermentation lids and airlocks fit them.
The Role of Airlocks in Safe Fermenting
Airlocks are little gadgets that work like a vent for your jars. When veggies or kombucha ferment, they release gases (mostly carbon dioxide). If you use a normal lid, gas can get trapped and build up pressure, or you end up opening the lid a lot which lets in extra air and possible contaminants.
An airlock keeps oxygen out while CO₂ escapes. That way, fermentation happens in a safe, oxygen free environment. This helps cut down on spoilage and lets you “set it and forget it” for a few days or weeks. There are several types, like water locks or one way valves, and most snap or screw onto a widemouthed jar lid.
Yogurt Makers and Starters: How to Get Creamy Results
There’s something pretty satisfying about making your own yogurt, and the right equipment really gives your results a boost. I started with jars and a warm oven, but a yogurt maker keeps things at just the right temperature (usually around 100°F 38C), which makes the yogurt come out thick every time.
You’ll need a yogurt starter, which just means a spoonful of plain yogurt or a powdered starter culture with live active bacteria. Some yogurt makers are electric, while others use hot water for insulation. Either way, you pour in milk with your starter, set the time, and let the machine do the rest.
A dedicated yogurt maker keeps things much simpler than trying to hold the temperature steady with a towel or heating pad. It’s worth checking out if you want consistent results.
Simple Steps for Setting Up Your First Home Fermentation
- Clean Your Equipment: Hot water and soap work for most items; sterilize jars if you want to be extra cautious. Keeping things clean helps prevent any unwanted bacteria or mold.
- Prepare Your Ingredients: Chop vegetables evenly, dissolve salt in water for brine, or heat your milk for yogurt. Use filtered water if your tap water is chlorinated, since chlorine can slow down fermentation.
- Pack Jars Firmly: Use a tamper to pack veggies tightly, then add weights to keep everything beneath the brine. For yogurt, just pour it into the jars or yogurt maker containers.
- Add Airlock Lids or Covers: Put an airlock or special lid on veggie ferments. For yogurt, seal or loosely cover the container to avoid condensation drops falling into the yogurt.
- Monitor and Taste: Set your jars away from direct sunlight at room temperature. Check on things daily. Most ferments are ready in three days to a week, and yogurt takes about 8 to 12 hours in a yogurt maker.
What to Watch Out For: Challenges When Starting Out
- Mold or Yeast Growth: Keeping veggies below the brine and using airlocks prevents most surface mold. If you ever see fuzzy mold or something smells wrong, it’s safer to toss the batch and start fresh.
- Temperature Fluctuations: Ferments prefer steady room temps, usually between 65 and 75°F (18–24°C). If your kitchen gets too cold, you can put jars in a cupboard or wrap them in a towel to keep them cozy.
- Too Much or Too Little Brine: Make sure everything stays submerged. Add extra brine if needed, or pour off a little if it’s overflowing.
- Strong Odors: A certain tang is normal, but if the smell gets funky (like rotten eggs), it’s a sign something went wrong.
Why Weights and Airlocks Matter
Fermentation works best without much oxygen. Weights keep veggies under liquid, while airlocks let gas escape and keep air out. Together, these make results much more consistent and safe.
Common Equipment Questions
Question: Can I use plastic containers?
Answer: Food grade plastic works, but glass doesn’t stain or hold odors, which is a big plus. Some acidic ferments can react with certain plastics, so I usually stick to glass for most things.
Question: Do I really need an airlock?
Answer: Not always, but they make things easier for longer ferments. For fast or low effort picks, regular lids work, but you might just need to “burp” the jars to let out gases.
Question: What’s the easiest ferment for total beginners?
Answer: Sauerkraut and yogurt are both super forgiving. Sauerkraut only needs cabbage and salt. Yogurt just needs milk and a bit of starter. Both teach you a lot about how fermentation works!
Getting the Most Out of Your Home Fermentation Setup
Investing in a few key tools saves a lot of frustration and helps you get better results every time. Wide mouthed jars, reliable weights, and well fit airlocks can all be reused for different ferments. A yogurt maker streamlines one of the most rewarding home food projects. If you’re careful with cleaning and storage, most of this equipment will last for years.
Tasting your first successful batch of homemade pickles or yogurt is a great feeling. It’s something you made yourself, and it just tastes better fresh. Once the basics are down, you can try more adventurous projects like kimchi, sourdough, or even homemade vinegars. The right setup really sets you up for a fun, and tasty, kitchen hobby.
If you want to dig into even more home fermentation ideas, you could check out books about fermenting or join online forums where people share tips and pictures of their own creations. That’s a great way to spot new recipes and troubleshoot if you ever have questions. When you experiment, remember that keeping your equipment clean and using reliable starters are the keys to success. Enjoy the adventure of home fermentation—your taste buds and kitchen will thank you!